# Develop the first applet custom plug-in
The applet custom plug-in adopts the applet framework, if you:
If you have experience in small program development, you can directly start developing small program custom plug-ins.
If you have not used Mini Programs, it is recommended to briefly study the Mini Program development documents:
See a simplest example
# The first step: we download the applet ( template (opens new window)),code show as below:
Modify the following files:
- Configuration file, which declares the entry file of the plugin
{
   "components":{},
   "main":"plugins/testplugin.js"
}
- Plugin code:
export default function (context) {
   return {
       /**
    * 返回要定制的自定义字段组件信息,不需要定制return null
    *
    comInfo: {
               name: "cmpt1",//(必须)自定义字段组件的名称,根目录config.json文件中components节点中指向对应组件的key
               prop: {test: 1}//会透传到自定义字段组件customProp属性,格式不限。
           }
    * @return {Object}
    */
       customFieldCom({ field }) {
           let comInfo = null;
           if (field || field.api_name === "field_testplugin__c") {
               console.log("test plugin: customFieldCom: " + field.api_name);
               comInfo = {
                   name: "cmpt1",
                   prop: { test: 1 },
               };
           }
           return Promise.resolve(comInfo); //异步return
           //return comInfo //或者直接同步return
       },

       /**通用按钮处理*/
       beforeNormalButtonsRender({ buttons }) {
           buttons ||
               buttons.some((it) => {
                   if (it.api_name === "button_testplugin__c") {
                       it.onClick = function () {
                           context.emitEvent("show-dialog1", { test: 654987 });
                       };
                       return true;
                   }
               });
           return Promise.resolve(buttons);
       },

       /**渲染fixed组件*/
       renderFixedCom() {
           return [
               {
                   name: "dialog1",
                   prop: { test: 1 },
               },
           ];
       },

       /**form页渲染完成*/
       renderEnd() {
           console.log("test plugin: renderEnd");
           wx.showModal({
               content: "插件拦截renderEnd",
               showCancel: false,
           });
       },
       /**提交前触发, resovle之后继续提交流程*/
       beforeSubmit(opt) {
           console.log("test plugin: beforeSubmit");
           return new Promise((resolve) => {
               wx.showModal({
                   title: "插件拦截提交",
                   content: "是否提交?",
                   showCancel: true,
                   success(rst) {
                       if (rst.confirm) {
                           resolve(opt);
                       }
                   },
               });
           });
       },
       /**提交成功后触发, resovle之后继续提交后动作*/
       submitted(opt) {
           console.log("test plugin: submitted");
           return new Promise((resolve) => {
               wx.showModal({
                   title: "插件拦截提交后动作",
                   content: "是否继续?",
                   showCancel: true,
                   success(rst) {
                       if (rst.confirm) {
                           resolve(opt);
                       }
                   },
               });
           });
       },
   };
}
# Step 2: Compress the file
Note that the decompressed file structure is directly dependent on each file of the applet after decompression, not a folder.
# Step 3: Find the "custom plugin" management interface in the management background, click "New" and upload the file
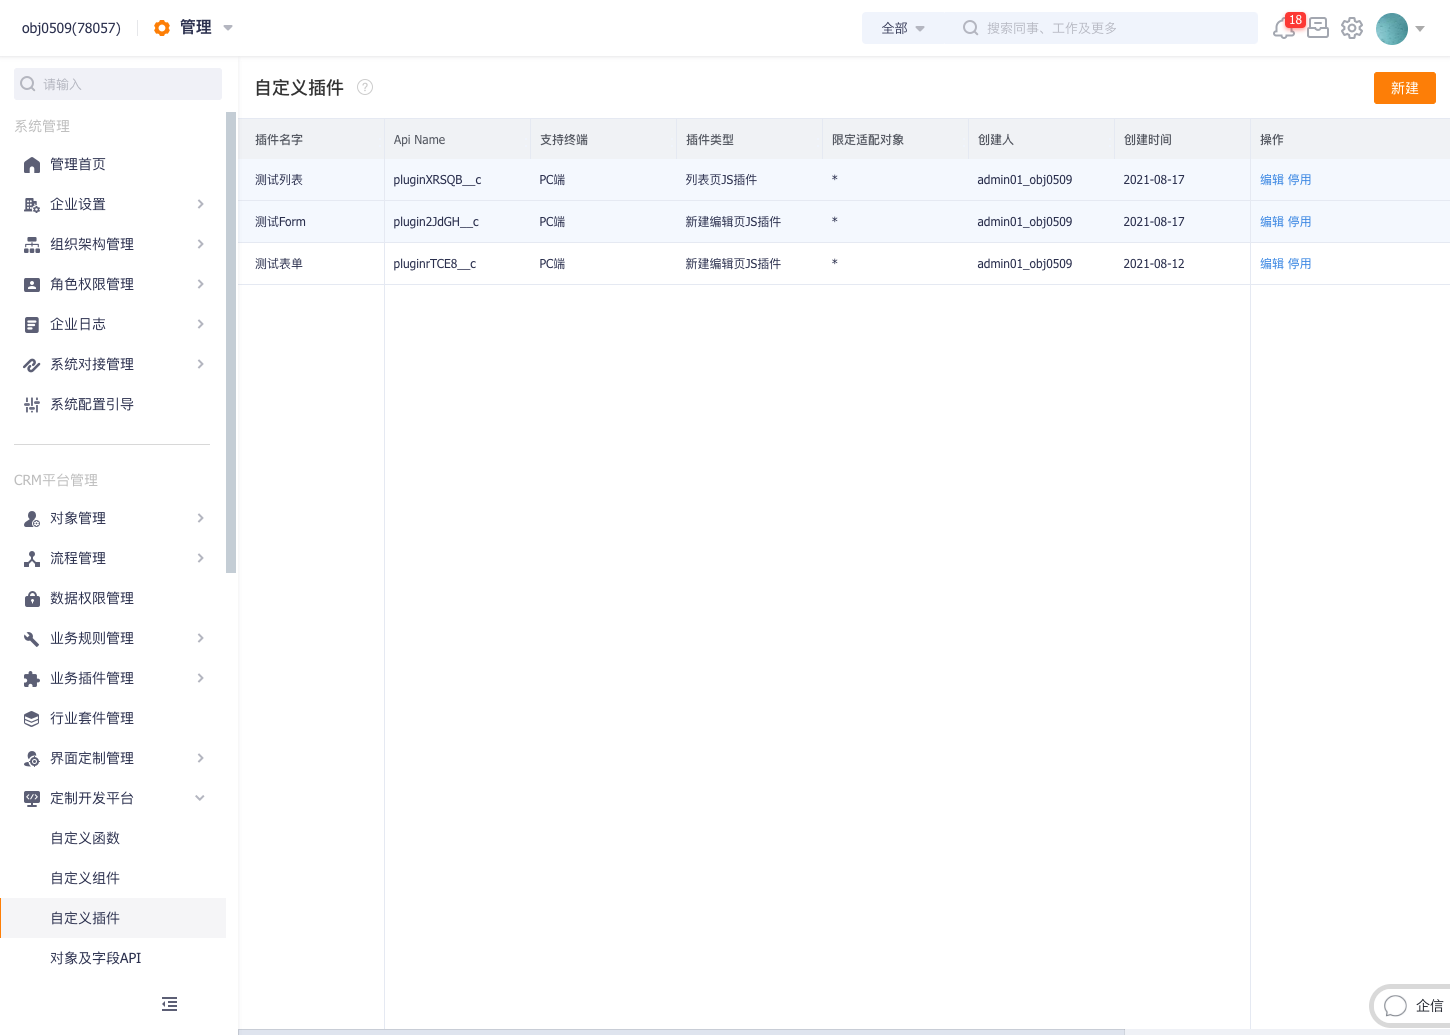
When creating a new plug-in, select Component Type as New Edit Page JS Plug in and Support Terminal as Mobile terminal .

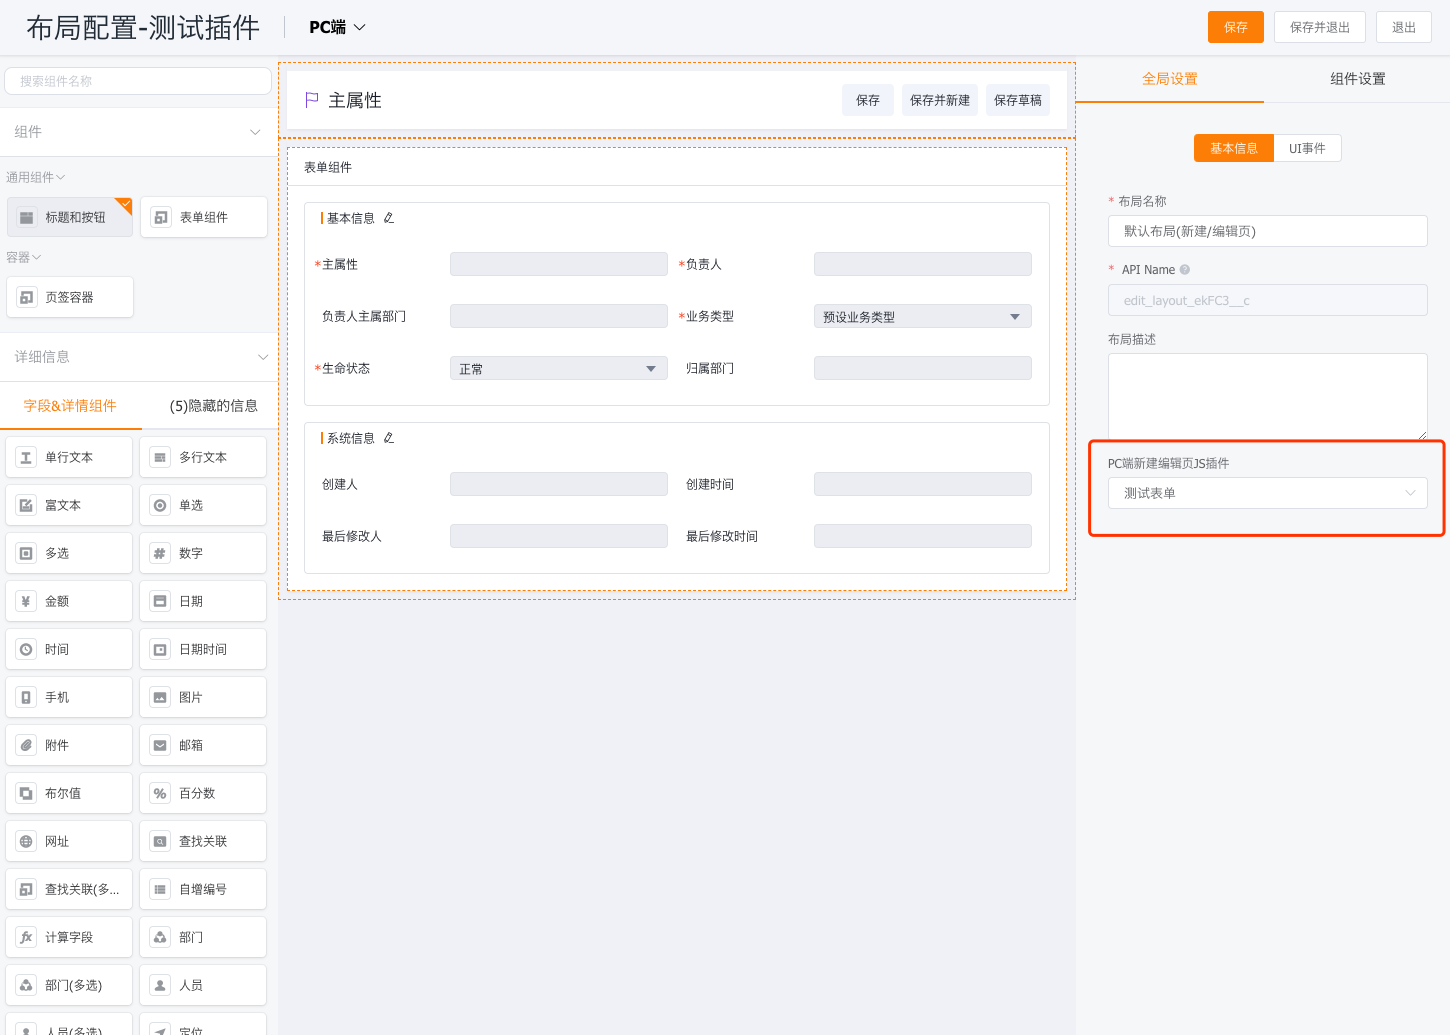
# Step 4: In the form layout designer, find "New Edit Page JS Plugin on PC" in "Global Settings", select the newly created plugin and save it
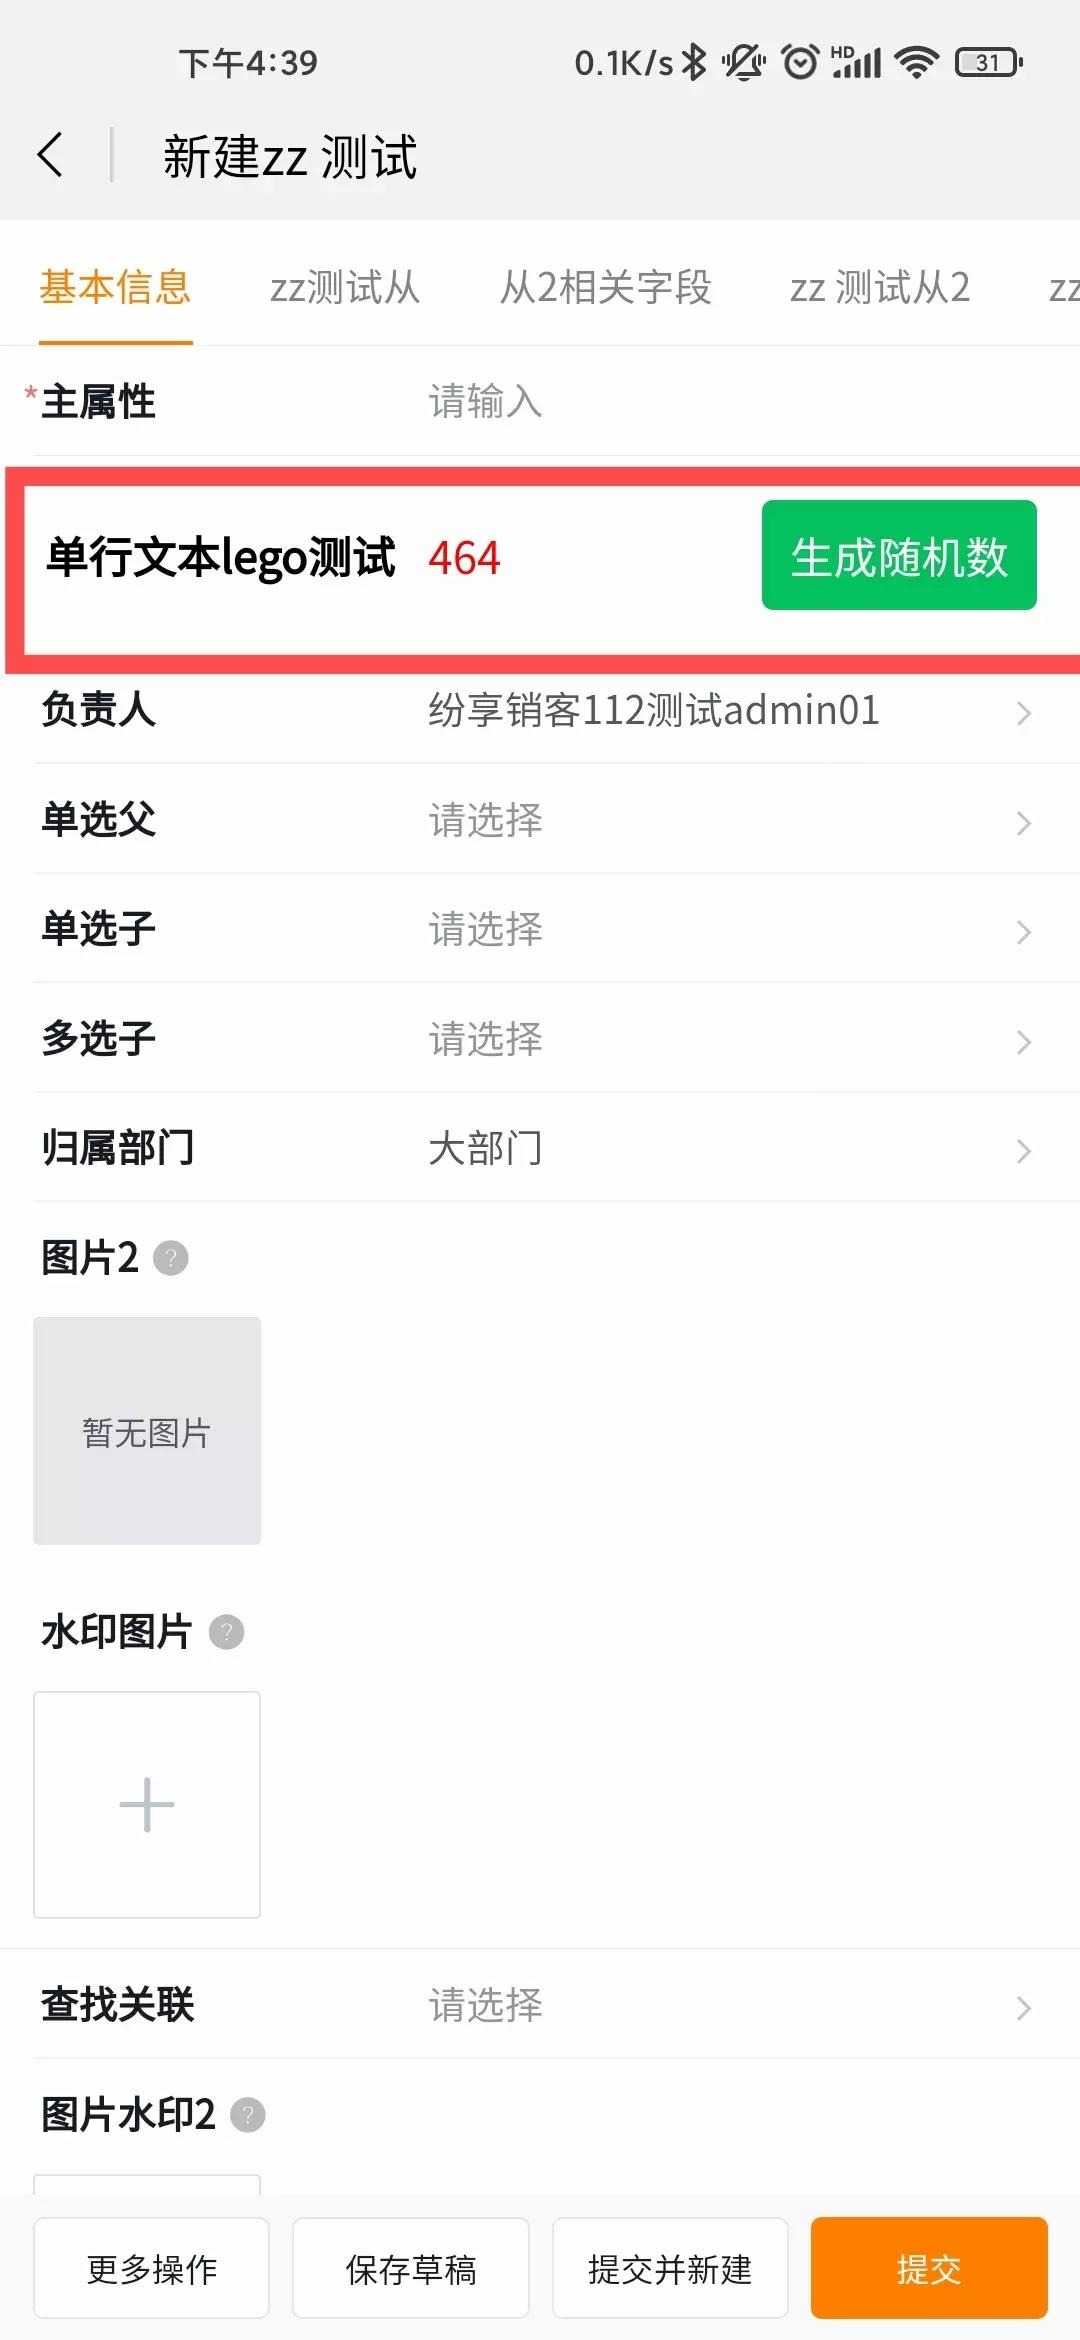
# Step 5: Open the Fenxiang Pinke app, and check whether the plugin takes effect when creating a new object.
# Plug-in code structure description
The entire project directory is the directory structure of the standard WeChat applet
There must be config.json in the root directory (important)
components: register the components that need to be exposed to the plugin user, the key is the component name, and the value is the relative path of the component; some plugins + internal subcomponents do not need to be registered;
main: The relative path of the plugin entry js file
The pages node of app.json is empty (important)
The js files and component definitions under the project refer to the WeChat specification, and there are no additional restrictions